


Recommendations of Dr Diane Weber, Vascular Surgeon
The clinical study on breast cancer patients has reported a very low incidence of PICC-port failure (2.6%), similar to the figures reported for chest-ports. (1) Therefore, PICC-ports are safe, and their use is recommended when chest ports are not an option.
However, one important question remains: how can we place PICC-ports while combining aesthetics and feasibility?
How to puncture your vein
The aesthetics aspect of the classic chest ports approach is relevant for PICC-port placement. This is especially important when encountering difficulties for a classic chest port approach such as tattoos, extensively burned skin, an increased BMI or breast cancer patients.
The approach for a PICC-port placement will be the same as for a PICC-line. The basilica vein has a lower thrombosis risk compared to the brachial or cephalic vein and should be punctured in the medial third of the humerus. The accessed vein should be measured. A catheter/vein ratio ⩽0.33 is considered appropriate. If this ratio may not be obtained, consider puncturing the vein in the upper third (Dawson’s ZIM “yellow zone”, cf. picture 1) and tunnel your catheter to the mid third of the upper arm (Dawson’s ZIM “green zone”).


Location of the catheter tip at the cavo-atrial junction is verified by intra-procedural methods (preferably by intra-cavitary ECG, ultrasound-based tip location or fluoroscopy).
The importance of the pocket in the PICC-port insertion
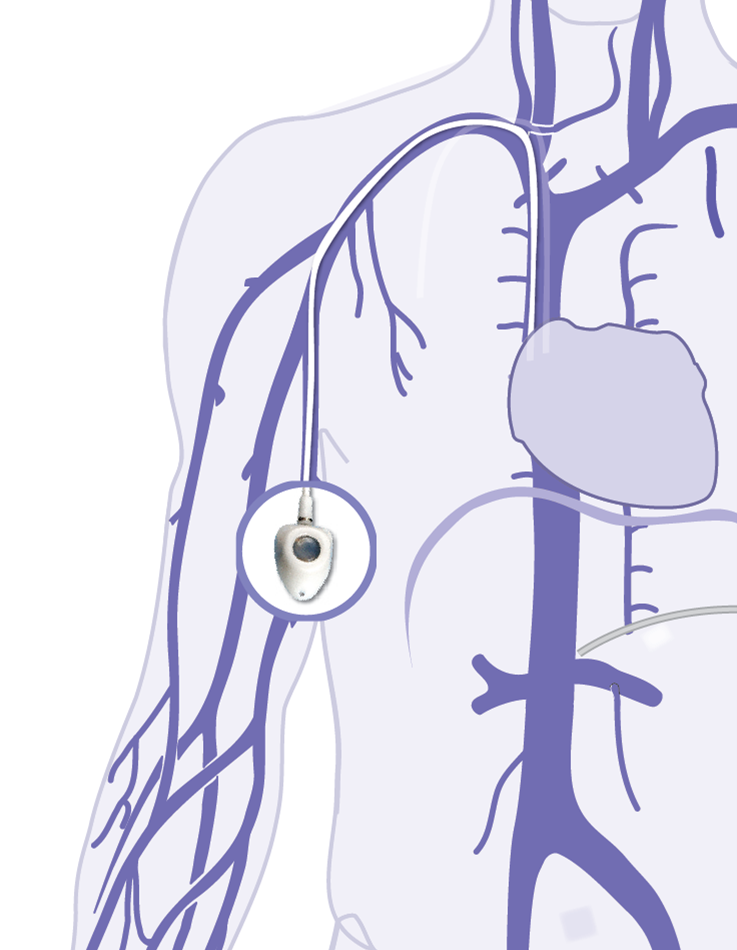
The ideal location for the port pocket would be the medio-dorsal sulcus of the biceps muscle. Here, the port might be hidden which can help us avoid stigmatizing patients.
In my opinion, there is another detail to pay attention to: make sure you do not dissect your port pocket too close to the skin surface but rather inside of the subcutaneous fat. This way, you will avoid skin necrosis as well as the visible “port bump” under the skin.


Moreover, the connective tissues between the skin and wire should be cut with a scalpel to make a slit a few millimeters long over the wire in the puncture point (step B, picture 2).


Without this step, the catheter route will be closer to the surface of the skin. Subsequently, the risk of catheter exteriorization will increase.


Green is the place to be for your port pocket. The sub-cutaneous pocket is created most frequently in the middle third of the upper arm (the “green zone” according to Dawson’s ZIM, cf. picture 1). The yellow zone is close to the arm pit and thus considered as an area of moisture with a higher risk of infection, especially right after port placement. The red zone needs to be avoided since arm flexion will be compromised and acceptance by your patient might be low. In this area, the visibility of the port will also be higher due to a lower subcutaneous fat in most patients.
Here, once more, it is important to avoid any catheter kinking, particularly at the port-catheter connection hub. This assures good catheter functioning and the loop underneath the skin stays invisible from the outside.
To achieve this goal, the venous puncture site should be aligned with the port pocket placement site. That means that the skin incision for the port pocket should be made from proximal (coming from the arm pit) to distal (towards the hand) following the trajectory of our puncture needle. The pocket itself can then be dissected slightly medial, lateral or distal to the incision.
Final points to reach aesthetic results
The large choice of different ports on the market, especially profiled ports and micro ports designed for PICC-port placement, makes it easier to combine feasibility with aesthetics. Your incision will be smaller and the port less visible.
The ideal placement of the port is in the medial part of the upper arm, more specifically in the biceps groove.

The port must be placed far from the incision in order to avoid placing the Huber needle through a fresh incision. This is a hard and fast rule for all port placements.
Skin closure can be done either with an intradermic running suture (I prefer using an absorbable 4.0 undyed monofilament suture) or skin glue. In my opinion, interrupted skin sutures have poorer aesthetic results.
PICC-ports are an aesthetic and safe alternative when placing a chest port is not an option. It is however important to note that in order to avoid possible complications, PICC-ports should be removed soon after the end of chemotherapy. That will lead to a decrease in the risk of skin erosion. Coaching nursing teams about the dressing is also a necessary step: a short Huber needle should be used and patients should be able to keep their arm still for a long period of time in order to avoid the Huber needle dislodgement.
Summary on how to place your PICC-port while achieving aesthetic results:
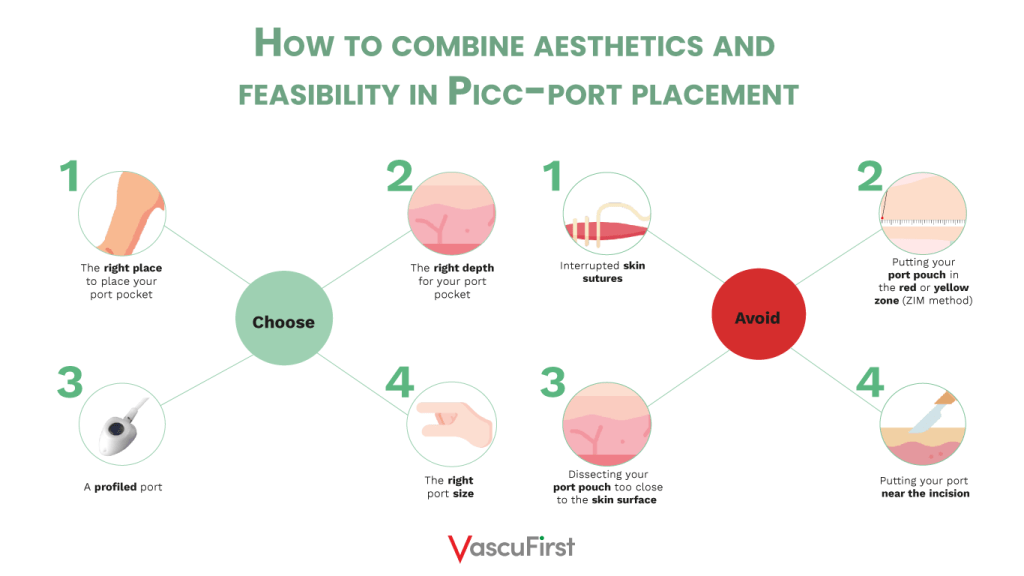

Key points to combine aesthetics and feasibility in PICC-port placement:

Bibliography:
- Bertoglio et al; J Vasc Access, 2020 and 2022


If you liked this article, you may also like: